How to Rotate a Pic I Just Uploaded Into Hubba.

Place Images into Shapes with the New Frame Tool in Photoshop CC 2019
The Frame Tool, a new feature in Photoshop CC 2019, makes it easy to place images into shapes! Learn how to draw shapes with the Frame Tool, how to place images into your shapes, how to instantly swap images with other images, and more than!
Photoshop CC 2019 introduces a brand new tool to Photoshop's Toolbar known as the Frame Tool. The Frame Tool is designed to make placing images into shapes both simple and intuitive, especially for users who are new to Photoshop. Information technology's nifty for designing layouts, and in fact, if you've used a page layout plan like Adobe InDesign, so you're already familiar with how the Frame Tool works. You lot just drag out a frame where yous desire to place an epitome on the page (or in this case, in your Photoshop document), and then elevate your image into the frame!
To be off-white, Photoshop's new Frame Tool is non necessarily the best way to work. That's considering anything you can do with the Frame Tool can too be done using Photoshop'south more flexible clipping masks. But the Frame Tool is easier, especially if you lot're new to Photoshop. And, the Frame Tool takes full reward of Photoshop'southward powerful smart objects. So even if yous're a more experienced Photoshop user, the Frame Tool still has something to offer. Let's come across how it works.
To follow along, you'll demand Photoshop CC. And if you're already an Adobe Creative Deject subscriber, make certain that your re-create of Photoshop CC is upward to engagement. Allow's become started!
How to use the Frame Tool in Photoshop CC 2019
Using the new Frame Tool in Photoshop CC 2019 to identify images into shapes is piece of cake. We just select the Frame Tool, draw a frame, drag an epitome into the frame, and so motility or resize the image inside the frame. Y'all can add a stroke around the frame to assistance with your design, and even swap the existing image with a new image just past dragging and dropping the new image into the frame.
To show you lot how it works, I've gone ahead and created a new document:
A new certificate in Photoshop CC 2019.
Step 1: Select the Frame Tool
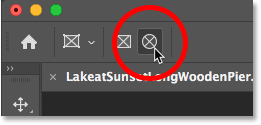
Photoshop's new Frame Tool is found in the Toolbar. It'southward the tool that looks like a box with an X through information technology. Click on it to select information technology. Y'all can too select the Frame Tool from your keyboard by pressing the alphabetic character K:
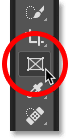
Selecting the Frame Tool from the Toolbar.
Stride 2: Cull a shape for your frame from the Options Bar
With the Frame Tool selected, choose a shape for your frame from the Options Bar. By default, yous'll draw a rectangular frame, but yous tin can too depict elliptical frames. Select the shape you need by clicking on its icon. I'll stick with the rectangular shape for now:
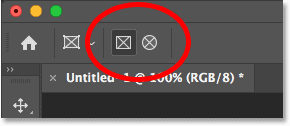
Choose a shape (rectangular or elliptical) for the frame.
Pace three: Draw a frame where you lot want to place an image
Then, elevate out a frame where you desire to place an image within your certificate:
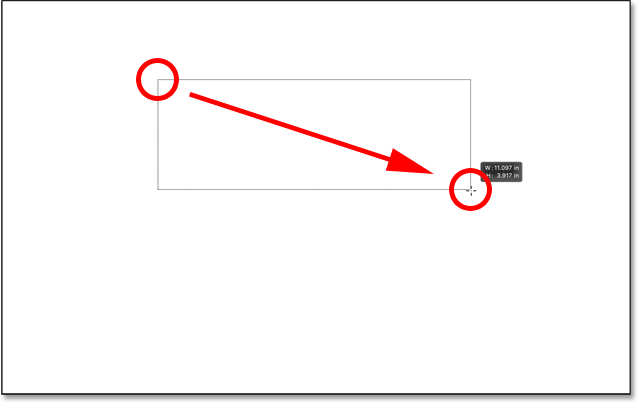
Click and drag to draw your frame.
Using modifier keys with the Frame Tool
To reposition the frame as you lot're drawing it, press and hold your spacebar, elevate the frame into position, and then release your spacebar to continue drawing the frame. To force a rectangular frame into a perfect square, agree your Shift key as you drag. Or if you lot're drawing an elliptical frame, hold Shift to force it into a perfect circumvolve:
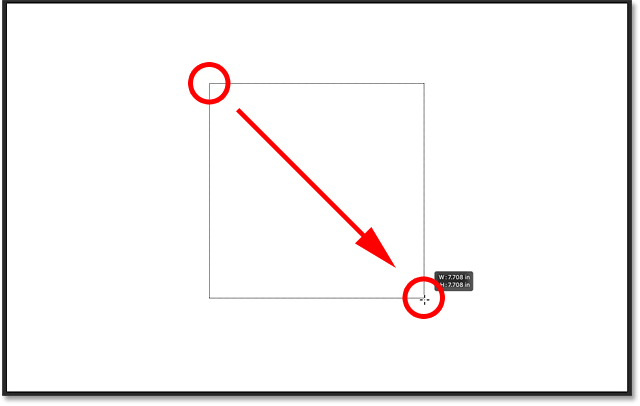
Concur Shift to force rectangular frames into squares or elliptical frames into circles.
In my case, I'll draw a broad frame in the upper half of the document:
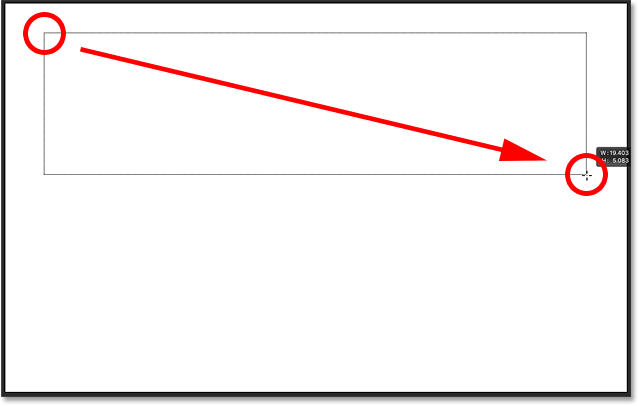
Drawing a rectangular frame where I want to place an image.
Release your mouse button, and the frame appears. The frame is a container for an epitome. But since the frame has no content still, it starts out empty:
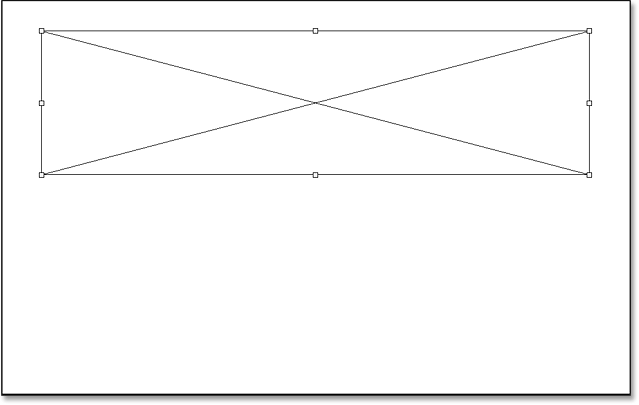
An empty frame has been added to the document.
The new Frame layer in the Layers panel
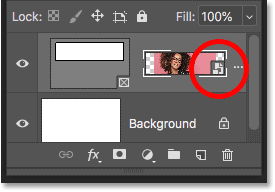
If nosotros look in the Layers panel, we see that Photoshop added the frame on its own separate Frame layer, which is also new in CC 2019. The thumbnail on the left represents the frame itself (indicated by the small frame icon in the lower right). And the thumbnail on the right is for the content inside the frame. Since in that location is no content withal, the thumbnail is just filled with white:

The icon in the lower correct tells u.s.a. it'due south a Frame layer.
Stride 4: Identify an image into the frame
To place an paradigm into the frame, go up to the File carte in the Menu Bar and cull Identify Embedded. Or you can choose Identify Linked. The divergence is that Identify Embedded will embed the prototype into your document, while Place Linked volition just link to the image on your computer. In most cases, Place Embedded is the better selection:
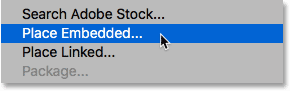
Going to File > Place Embedded.
And so navigate to the epitome on your computer, select it, and click Place:
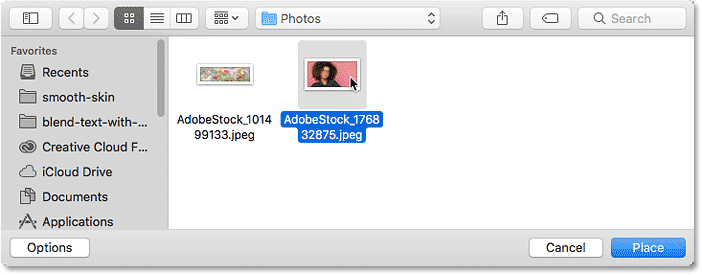
Selecting the image to place within the frame.
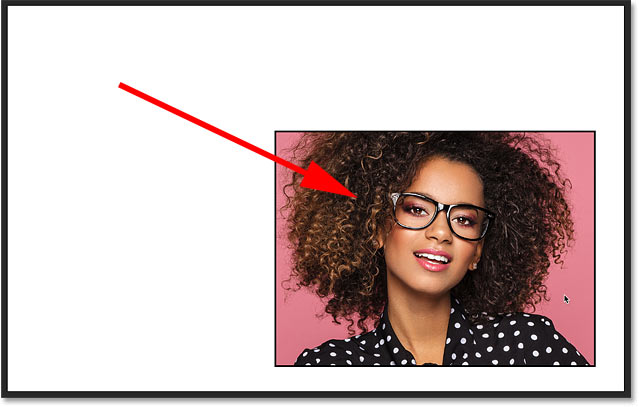
Photoshop places the image into the frame. And it automatically resizes the epitome to friction match the frame's size (photo from Adobe Stock):
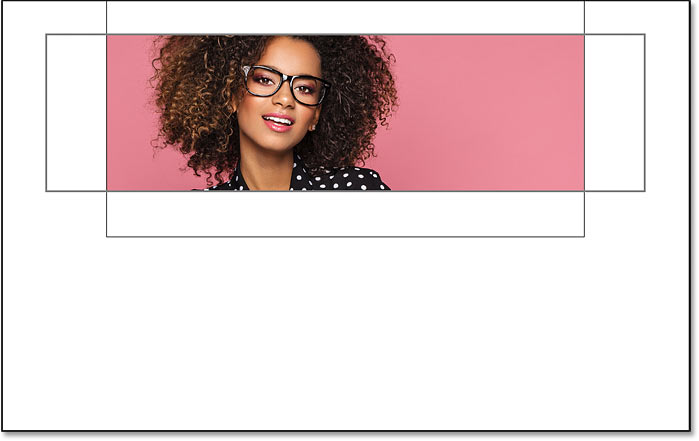
The image is placed and resized in the frame. Photo credit: Adobe Stock.
Placing the image as a smart object
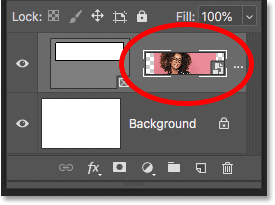
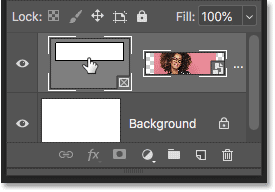
If we look again at the Frame layer in the Layers panel, we see the content of the frame now appearing in the thumbnail on the right. Besides, detect the smart object icon in the lower right of the thumbnail, telling us that Photoshop has automatically converted the image into a smart object.
If y'all're new to Photoshop, this may not hateful much to you, but smart objects are a proficient thing. It means we can resize the prototype inside the frame without losing quality. And, we tin can easily replace the paradigm with another one, as we'll see how to practice in a few moments:
The Frame layer showing the content added as a smart object.
How to switch between the frame and the image
Now that we've placed an image into the frame, let'due south look at how to switch betwixt the frame and its contents.
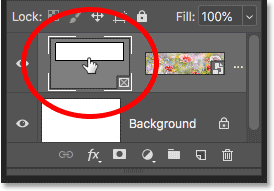
From the Layers console
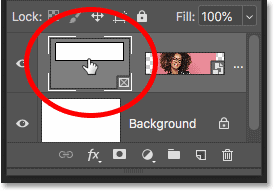
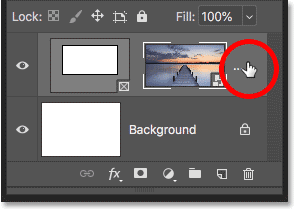
One way to switch betwixt the frame and the image is from the Layers panel. Notice the white border around the content's thumbnail. This tells usa that the epitome inside the frame is selected:
The border tells the states which one (the frame or the prototype) is selected.
Selecting the frame
To select the frame itself, click on the frame's thumbnail on the left:
Selecting the frame by clicking the left thumbnail.
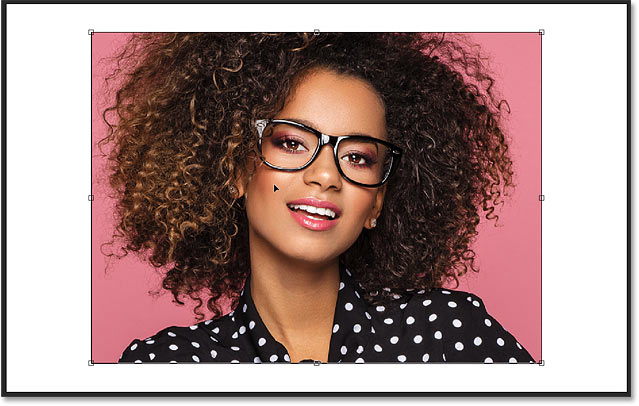
Forth with the edge around the thumbnail, another way to tell that the frame is selected is that we can see the transform handles around the frame in the certificate. Nosotros apply the handles to resize the frame, and nosotros'll come back to them before long:
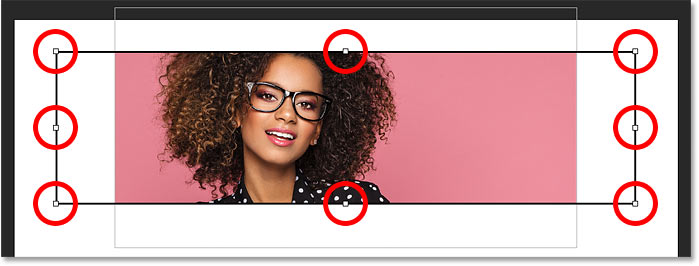
The transform handles hateful that the frame is selected.
Selecting the image
To switch back to the image, click the thumbnail on the right:
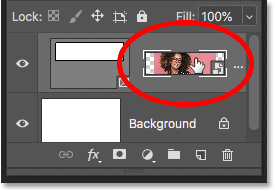
Selecting the paradigm by clicking the right thumbnail.
And with the paradigm selected, the transform handles around the frame disappear:
The frame's transform handles are gone.
Selecting both the frame and the image
To select both the frame and the image at the same time, press and hold your Shift key and click on the one that's non currently selected. The white edge appears around both thumbnails:
Shift-click on the other thumbnail to select them both at in one case.
Deselecting the frame or the image
And then to switch dorsum to having simply the frame or the image selected, click on the 1 y'all need. I'll reselect the frame, and this deselects the image:
When both are selected, click on a thumbnail to deselect the other one.
From the document
Another way to switch between the frame and its contents is from the document.
Selecting the image
To select the image, simply click on it inside the frame. Discover the outline around the image, and that information technology includes the parts of the image that are subconscious because they extend beyond the frame's boundaries:
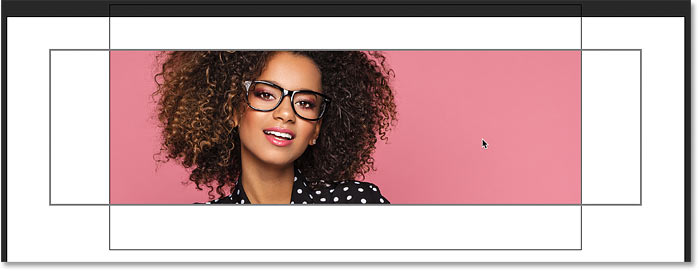
Clicking on the prototype to select information technology.
Selecting the frame
To select the frame, click directly on the frame's outline. The transform handles reappear:
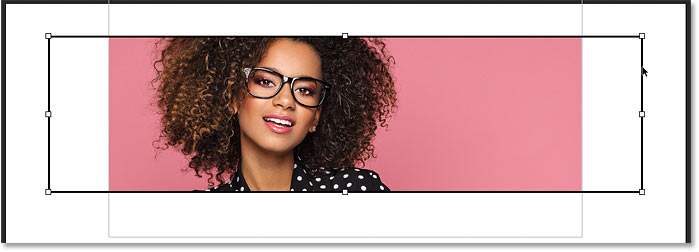
Clicking on the frame to select it.
Selecting the frame and the image
And to select both the frame and the image, double-click on the image. The outline effectually the epitome disappears and you'll meet only the outline around the frame:
Double-clicking on the prototype to select both the frame and the image at once.
With both the frame and the epitome selected, you tin can click and drag both of them together within the certificate:
Click and drag the frame and the image when both are selected.
How to undo a step with the Frame Tool
I'll disengage that by going upwardly to the Edit carte du jour and choosing Undo Move. Photoshop gives us multiple undos with the Frame Tool. To move backwards through your steps, press Ctrl+Z (Win) / Control+Z (Mac) repeatedly. And to redo a pace, press Shift+Ctrl+Z (Win) / Shift+Command+Z (Mac):

Undoing the terminal step with the Frame Tool.
Deselecting the frame when both are selected
Finally, when you have both the frame and the image selected, you tin can switch back to selecting just the paradigm by again double-clicking on information technology. Then, when the epitome or the frame is selected, double-clicking on the epitome volition select them both. And when they're both selected, double-clicking will select only the image:
Double-clicking over again to select only the prototype.
How to movement and resize the frame's contents
And then now that we know how to select and switch between the frame and its contents, permit's acquire how to move and resize the image inside the frame.
How to move the prototype in the frame
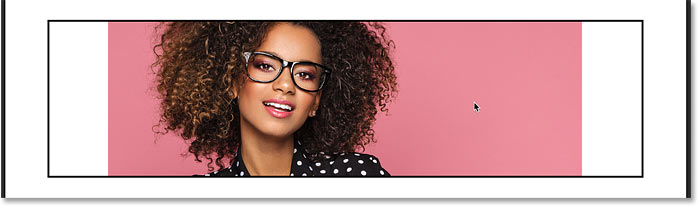
To move the prototype, just click and elevate information technology. Simply the area inside the frame remains visible:
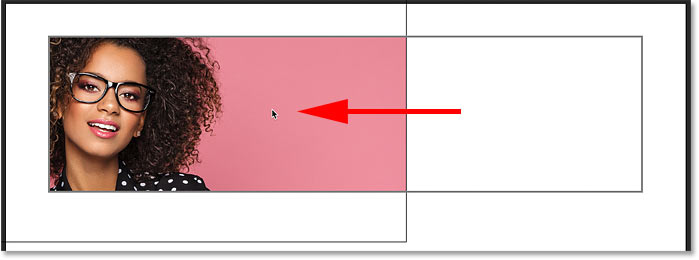
Click and drag to reposition the prototype inside the frame.
How to resize the epitome in the frame
To resize the image, we don't use the Frame Tool direct. Instead, we employ Photoshop's Gratuitous Transform command. Go upwards to the Edit menu and choose Free Transform:
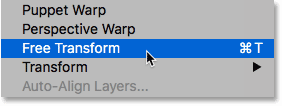
Going to Edit > Costless Transform.
And then, drag the handles to resize the image. In Photoshop CC 2019, Costless Transform automatically locks the attribute ratio, and so in that location's no need to hold Shift as you drag. Merely if you want to resize the paradigm from its center, press and concur Alt (Win) / Selection (Mac). When you lot're done, printing Enter (Win) / Return (Mac) to take it:
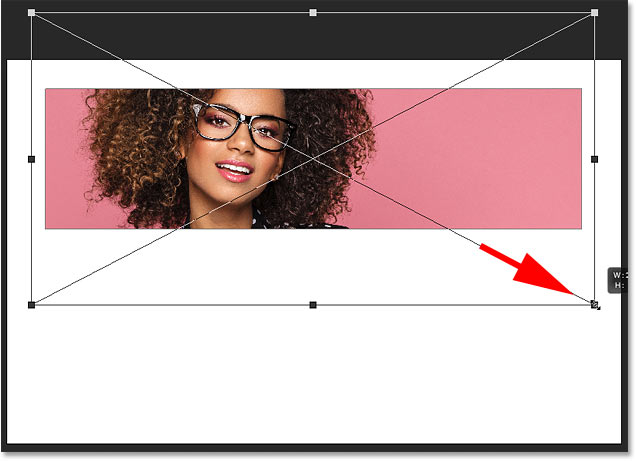
Resizing the image inside the frame with Free Transform.
How to resize the frame
To resize the frame, not the contents, first click on the frame'southward outline to select it:
Selecting the frame by clicking straight on its outline.
Then drag whatsoever of the handles to reshape and resize it. If you press and hold your Shift fundamental while dragging a corner handle, you lot'll lock in the frame's original aspect ratio:
Resizing the frame by dragging the transform handles.
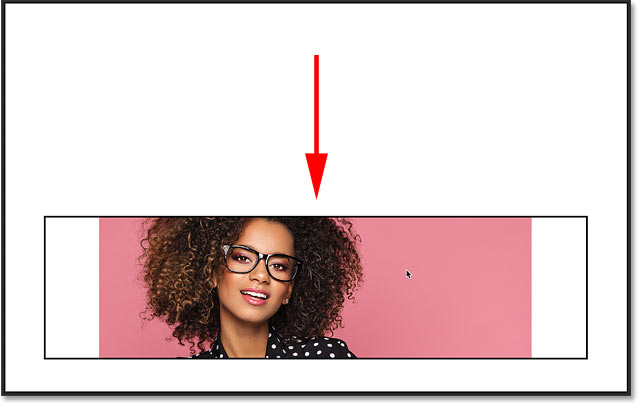
Once yous've resized the frame, you can click and drag the epitome inside the frame to reposition it:
Moving the image later on resizing the frame.
How to move the frame and the image together
To movement both the frame and the image at the same time, double-click on the image to select them both:
Double-clicking to select the frame and the image.
And then click and drag to move both of them together:
Dragging the frame and its content at the same time.
How to resize the frame and the image together
To resize both the frame and the epitome at one time, over again brand sure both are selected. Go up to the Edit menu and choose Costless Transform:
Going back to Edit > Free Transform.
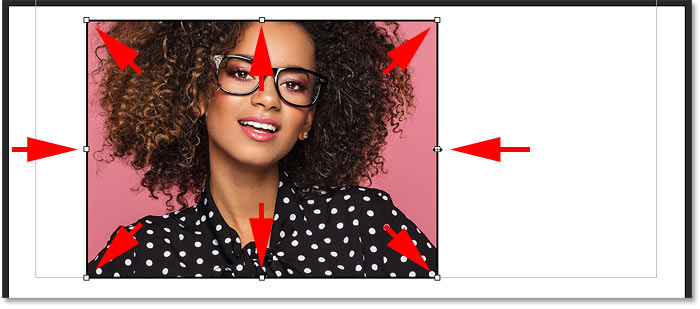
And then drag the handles to resize the frame and its contents:

Dragging the Costless Transform handles to resize the frame and its contents.
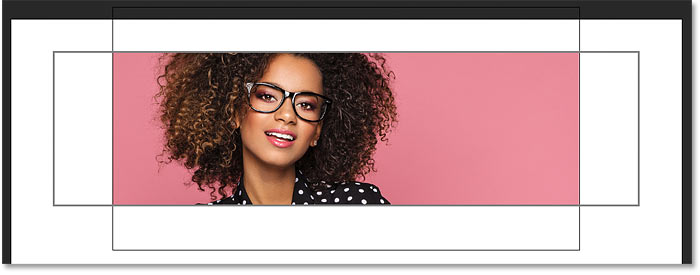
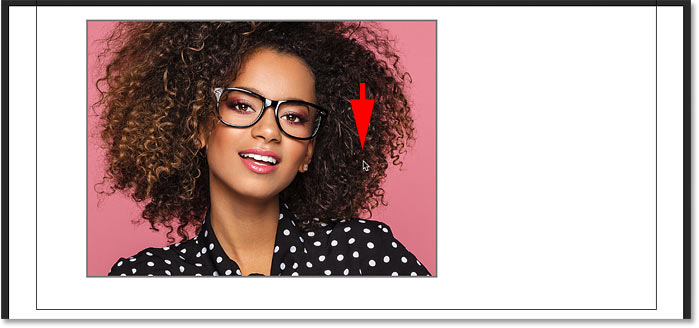
You can also reposition the frame and its contents by clicking and dragging within the Costless Transform box. Hither I've centered the frame and the prototype in the certificate. Printing Enter (Win) / Return (Mac) when you're done to accept it:
Centering the frame and the image in the certificate with Free Transform.
Subscribe to our newsletter
Be the first the know when new tutorials are added!
How to replace the frame's contents
A groovy characteristic of Photoshop's new Frame Tool is that we tin hands swap out one image for some other.
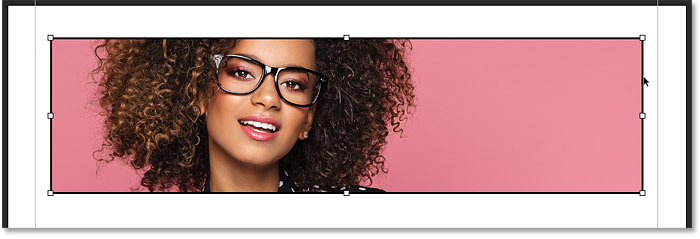
I'll press Ctr+Z (Win) / Command+Z (Mac) a few times to disengage my steps and return my frame to its original size and location:

The frame at its original size and location in the document.
Method one: Using the Identify Embedded or Identify Linked control
One fashion to supersede the current epitome with a dissimilar image is to get upwards to the File carte du jour and choose Identify Embedded (or Identify Linked):
Going to File > Identify Embedded.
Navigate to the new image on your computer. Then select information technology and click Place:
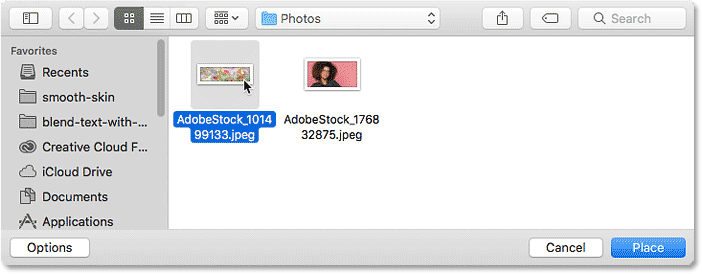
Selecting and placing the new image into the frame.
Method 2: Drag and drib
Or, if you already have the image open up in a File Explorer (Win) or Finder (Mac) window, you can elevate and drop the new prototype onto the existing one:
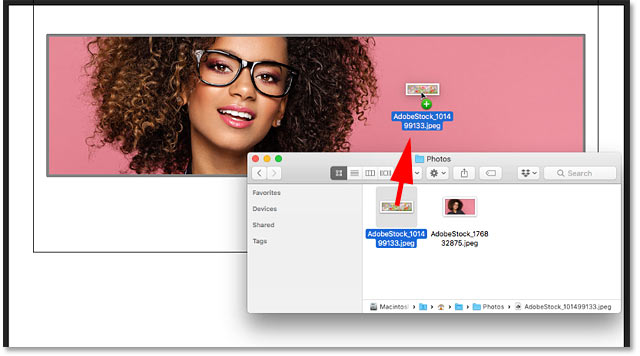
Dragging and dropping the replacement epitome into the frame.
Method 3: From the Libraries console
And yet another way to add or supersede the contents is past dragging an image from your Libraries panel onto the frame:
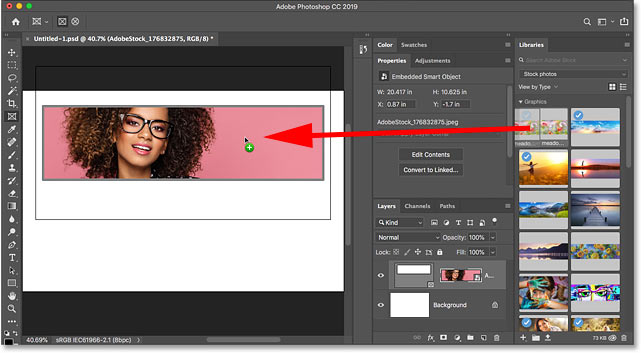
Dragging the replacement epitome from the Libraries panel onto the frame.
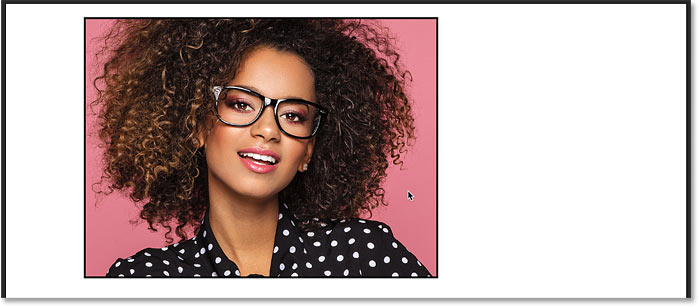
Photoshop instantly replaces the previous image with the new ane. You tin can then utilize Free Transform to resize the image inside the frame if needed (photograph from Adobe Stock):
The Frame Tool makes it easy to supervene upon i image with another. Photograph credit: Adobe Stock.
How to add together a stroke around the frame
Next, permit's look at how to add a stroke around the frame. Photoshop's normal layer styles, found at the lesser of the Layers panel, won't work with frames. But we can add together a stroke. Y'all'll notice the Stroke choice in the Properties panel:
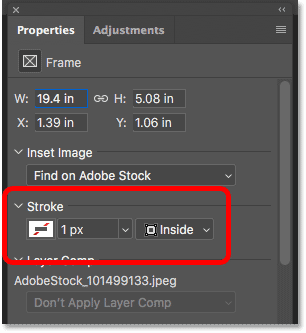
The Stroke option for the Frame Tool in the Backdrop panel.
Why tin't I see the Stroke pick?
If you're not seeing the Stroke pick, brand certain you take the frame itself selected in the Layers panel:
The Stroke selection is but available when the frame is selected.
Choosing the stroke colour, position and size
Click the swatch below the word "Stroke" to choose a colour. So choose a position (Inside, Center or Outside) and size:
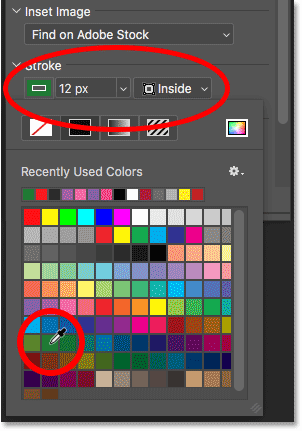
Setting the stroke's color, position and size.
The stroke appears around the frame:
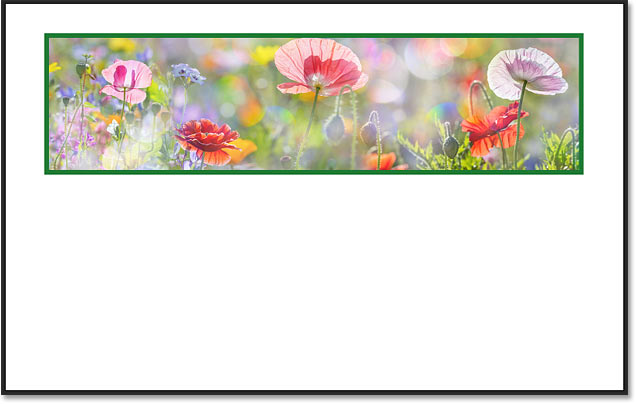
The frame with the stroke added.
How to remove the stroke from effectually the frame
To remove the stroke, click again on the color swatch beneath the give-and-take "Stroke" and cull No color (the swatch with the red line through it):
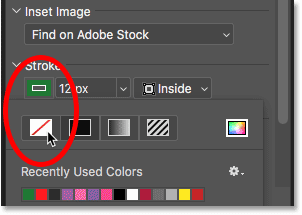
Removing the stroke by clicking the "No colour" swatch.
How to add a frame around an existing image
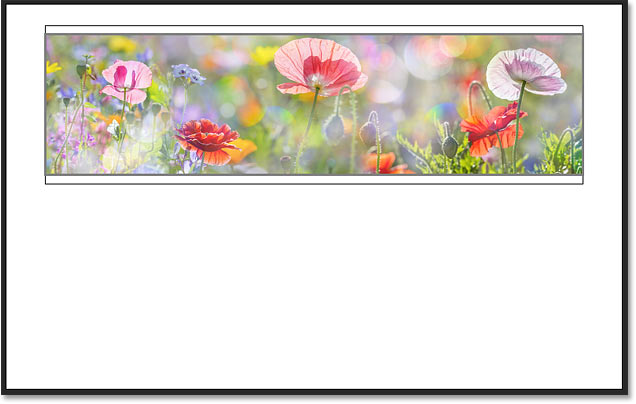
Finally, permit'due south expect at one more than way to use the Frame Tool, and that'due south by adding a frame to an existing prototype. We'll likewise await at how to remove a frame from an paradigm. I'll switch over to another image I've opened in Photoshop:
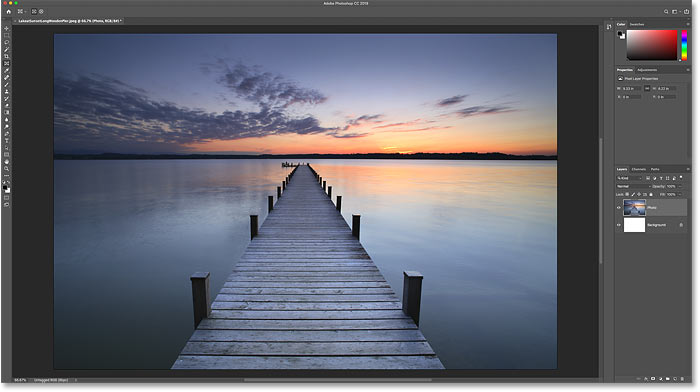
An image open in a carve up document. Photo credit: Adobe Stock.
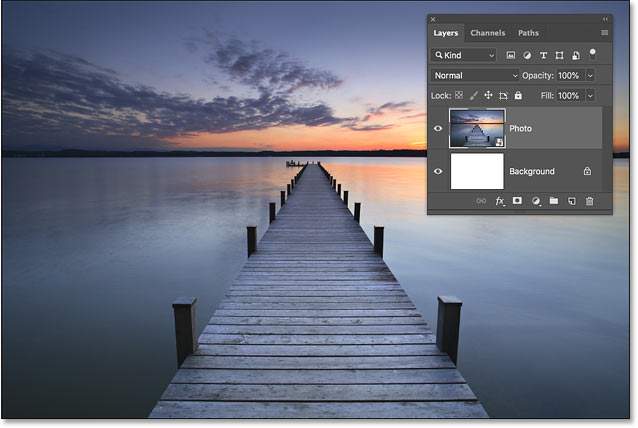
And if we await in the Layers panel, we encounter the image on a layer to a higher place the Groundwork layer. Note that we can't add a frame to the Background layer. Then for this to work, you'll demand your image to exist on a separate layer above it:
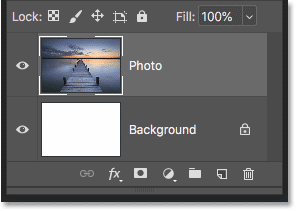
Frames can't be added to images on the Background layer.
How to place the image into a rectangular frame
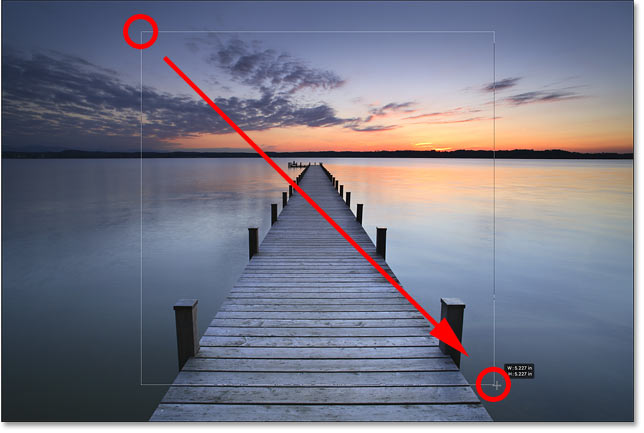
With the layer selected, and the Frame Tool selected in the Toolbar, click and elevate out a frame inside the image:
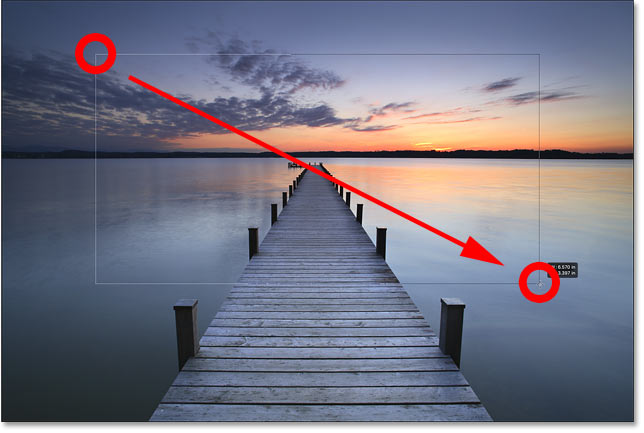
Cartoon a frame inside the image.
When you release your mouse push button, Photoshop adds the frame and places the image inside it:
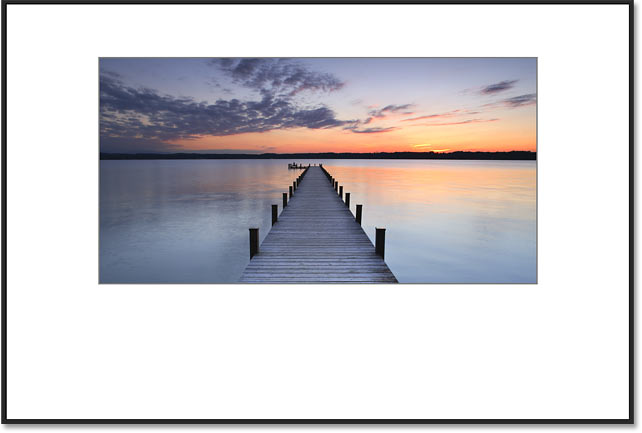
The image now sits inside the frame.
And in the Layers console, we run into that Photoshop converted the image into a smart object, simply like information technology did before:
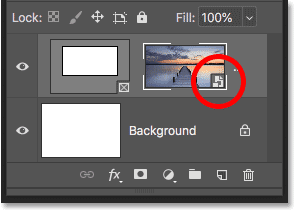
The image, converted to a smart object, on the Frame layer.
How to remove a frame from an image
I've added a rectangular frame to the epitome. But what if I meant to add an elliptical frame instead? In that example, I can remove the existing frame past right-clicking (Win) / Control-clicking (Mac) on the Frame layer in the Layers panel:
Right-click (Win) / Control-click (Mac) on the Frame layer.
And and so choosing Remove Frame from Layer:

Choosing "Remove Frame from Layer" from the menu.
This removes the frame but keeps the epitome:
The frame is gone only the image remains.
Placing the prototype into an elliptical frame
I'll switch from a rectangular frame to an elliptical frame in the Options Bar:
Selecting the Elliptical frame shape.
And then I'll click and drag out an elliptical frame inside the prototype. To force the frame into a perfect circle, I'll printing and hold my Shift fundamental as I drag. At first, information technology looks similar I'm drawing a square frame:
Holding Shift while dragging to force the frame into a circle.
But when I release my mouse push button, the circumvolve frame appears with the epitome within it:
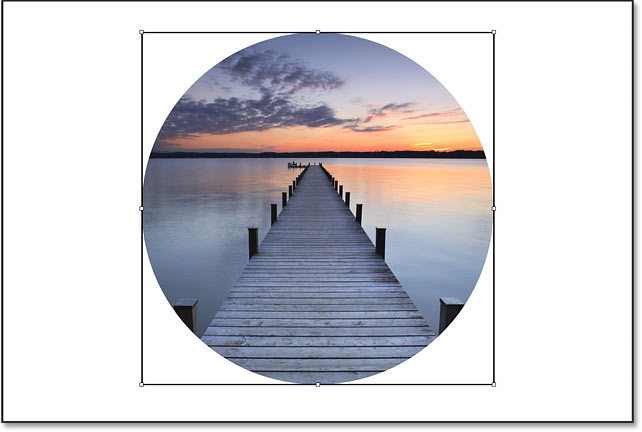
The image has been placed into the circumvolve frame.
Related tutorial: How to crop images into circles!
And at that place nosotros take it! That's the basics of how to use the new Frame Tool in Photoshop CC 2019! Check out our Photoshop Basics section for more tutorials!
Other Stuff
© 2022 Photoshop Essentials.com.
For inspiration, not duplication.
Site design past Steve Patterson.
Photoshop is a trademark of Adobe Systems Inc.
Source: https://www.photoshopessentials.com/basics/place-images-into-shapes-with-the-new-frame-tool-in-photoshop-cc-2019/
0 Response to "How to Rotate a Pic I Just Uploaded Into Hubba."
Post a Comment